0%

這篇文章會告訴你如何在 react native 利用 firebase 進行 Facebook 登入

主要可以分成三個步驟:

  1. 設定 facebook API
  2. 連結 Expo 和 facebook
  3. 連結 Firebase

一、設定 facebook API

1. 安裝 Expo 的 expo-facebook

1
expo install expo-facebook

2. 到 Facebook for Developers 註冊並建立應用程式

我們要的是facebook登入,所以選「打造互聯體驗」

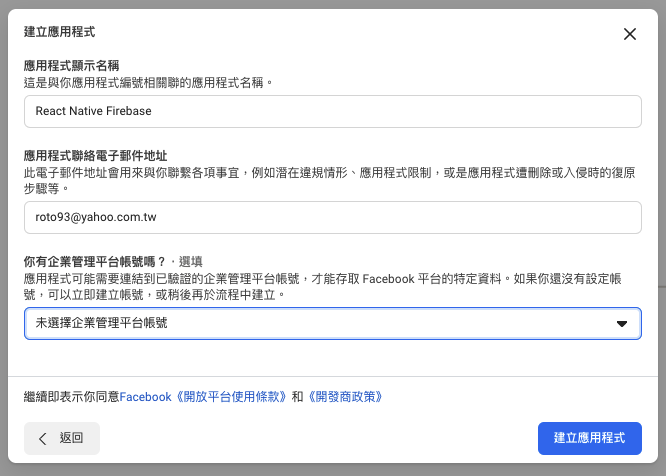
輸入名稱和email
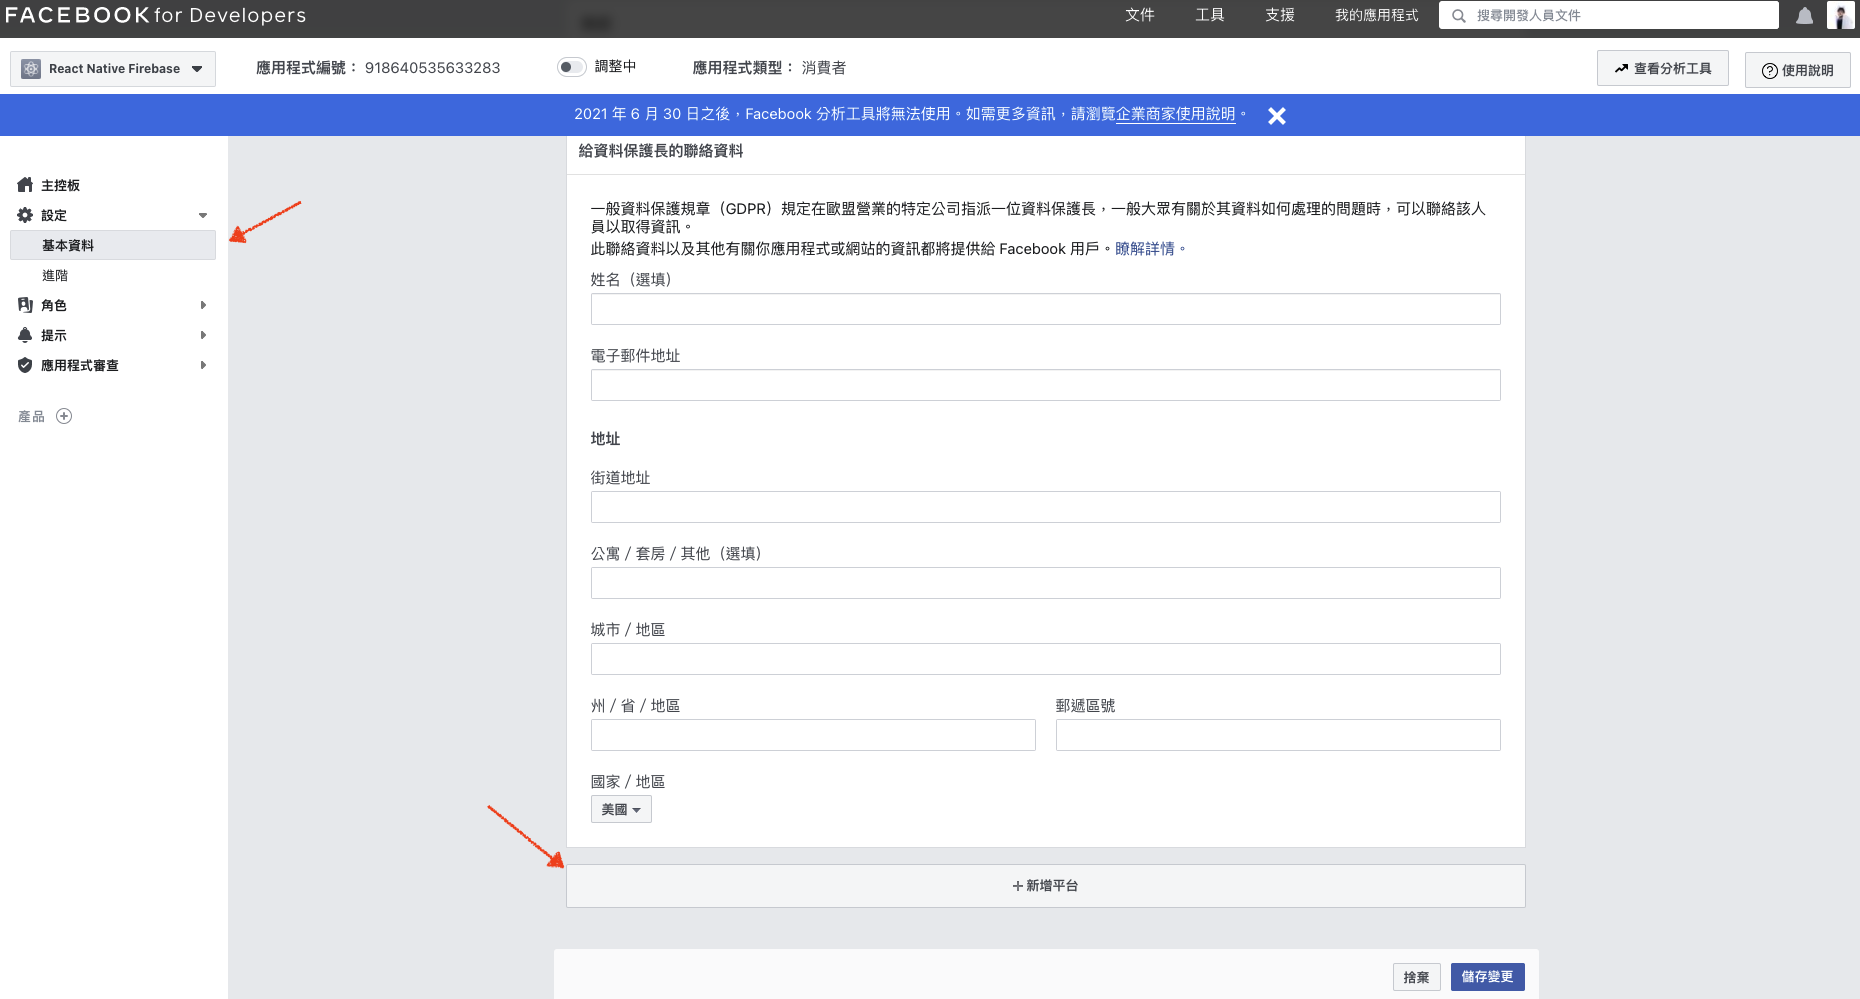
3. 設立 → 基本資料 → 新增平台
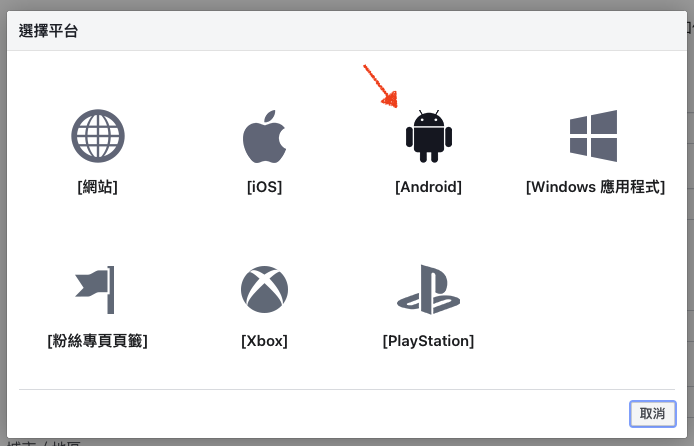
4. 選擇 iOS 和 Android
5.

在 ios 套件組合編號輸入 host.exp.Exponent

在 android 金鑰輸入 rRW++LUjmZZ+58EbN5DVhGAnkX4=

→ 儲存變更

糟糕為了放一些圖結果文章變得好長XD

趕快進到下個步驟

二、連結 Expo 和 facebook

1. 到 App 中定義 onlogIn()

1
2
3
4
5
6
7
8
9
10
11
12
13
14
15
16
17
18
19
20
21
22
23
24
25
async function onLogIn() {
try {
await Facebook.initializeAsync({
appId: YOUR_APP_ID, // 換成你的AppId
});

//{type,token,expirationDate,permissions,declinedPermissions,}
const result = await Facebook.logInWithReadPermissionsAsync({
permissions: ['public_profile', 'email'], // 還有其他 permission
});
if (result.type === 'success') {
// 利用 FB 提供的圖形API fetch 用戶名
const response = await fetch(`https://graph.facebook.com/me?access_token=${result.token}`);
alert( await response.json().name)
//setToken(result.token)
//在這把token存起來,有時會在onLogIn外面遇到

console.log('Logged in!');
} else {
console.log('type = cancel')
}
} catch ({ message }) {
alert(`Facebook Login Error: ${message}`);
}
}

Firebase提供的方法有些部分不適用Expo
所以這步驟與官網相比有更改一些變數
像是把Facebook.logInWithReadPersissionsAsync()回傳的值設成result

完成後可以先 run 看看
在執行 onLogIn()
會跳出 popup 問你要登入哪個 fb 帳戶
如果手機本身已經有登入 fb 帳號的話
就會直接跳出是否提供權限的視窗,按同意
但我們還沒有定義在 firebase 註冊的方法,所以還沒辦法登入

三、連結 Firebase

1. 到 firebase console 開啟 facebook sign in 的功能

appId 和 appKey 可以在 facebook API 頁面找到

2. 定義 checkLoginState()

1
2
3
4
5
6
7
8
9
10
11
12
13
function checkLoginState(response) {
let unsubscribe = firebase.auth().onAuthStateChanged((firebaseUser) => {
unsubscribe();
if (!isUserEqual(response, firebaseUser)) {
let credential = firebase.auth.FacebookAuthProvider.credential(
response.token);
firebase.auth().signInWithCredential(credential)
.catch((error) => { });
} else {
console.log('User is already signed-in Firebase with the correct user.')
}
});
}

Firebase 提供的方法有些部分不適用 Expo
所以這步驟有更改一些變數
像是刪除response.authResponse的段落
以及將response.authResponse.accessToken修改成response.token

3. 定義 isUserEqual()

1
2
3
4
5
6
7
8
9
10
11
12
13
function isUserEqual(facebookAuthResponse, firebaseUser) {
if (firebaseUser) {
var providerData = firebaseUser.providerData;
for (var i = 0; i < providerData.length; i++) {
if (providerData[i].providerId === firebase.auth.FacebookAuthProvider.PROVIDER_ID &&
providerData[i].uid === facebookAuthResponse.userID) {
// We don't need to re-auth the Firebase connection.
return true;
}
}
}
return false;
}

最後在onLogIn()裡面呼叫checkLoginState()
並傳入 result 便完成登入

小插曲

最後用 facebook 登入時遇到一個問題
如果這個用戶之前有用其他登入方式 (如email) 註冊過的話
又正好他也用同個 email 來註冊 facebook
這樣當他用 facebook 註冊 app 時就會報錯

這時有幾個解決方案:

1. 要求用該方式登入

fetchSignInMethodsForEmail() 找到當初用這個 email 登入的方法,然後跳出視窗請用戶改用此方法登入。

2. 讓他創建新帳號 獨立運作

Firebase console -> Sign-in Method -> 進階
允許用相同 email 建立不同帳戶

讓用不同管道登入的相同帳號獨立運作
但這有時不太好,因為登入最初的用意就是針對每個真實用戶
如果一個用戶能有多個帳號,有點違背初衷

3. 讓他創建新帳號 再合併

與上個步驟相同,但在用戶登入後請他合併帳號
可用 linkWithCredential()

Facebook 還有提供 圖形API
聽說功能強大
之後有機會學一學 再整理上來

繼之前介紹 Firebase 的 Email 登入和匿名登入後

這篇要示範的是 Google 登入

主要可以分成下列幾個環節:

  • 開啟 google API

  • 使用 Expo 的 Google Auth SDK

  • 使用 Firebase 的登入流程

個人覺得有點小複雜,原因正如我之前說的
Firebase 和 google 之間多了 Expo 的交接
需要一些 firebase 官網沒有提供的環節

像是 user 物件的內容就不一樣
我需要兩邊 doc 來回查才知道到底是怎樣

這真的要記錄下來
不然我大概一下就忘了

一、開啟 google API

1. 首先到 google 的 credentials page

2. 建立專案


這邊無法選擇內部,因此放心選外部
後續還有一些步驟但不成問題

3. 回到憑證頁面 -> 建立憑證 -> 選 OAuth 用戶端 ID

4. 依照手機系統選擇 Android / iOS

5. 設定套件名稱&憑證指紋

  • 套件名稱填 host.exp.exponent
  • 在 terminal 中 run openssl rand -base64 32 | openssl sha1 -c 並將 output 填入 憑證指紋

二、使用 Expo 的 Google Auth SDK

expo install expo-google-app-auth

1
2
3
4
5
6
7
8
9
10
11
12
13
14
15
16
17
18
19
import * as Google from 'expo-google-app-auth';

async function signInWithGoogleAsync() {
try {
const result = await Google.logInAsync({
androidClientId: YOUR_CLIENT_ID_HERE, //在這裡貼上你的用戶端編號, 記得加引號
// iosClientId: YOUR_CLIENT_ID_HERE,
scopes: ['profile', 'email'],
});

if (result.type === 'success') {
return result.accessToken;
} else {
return { cancelled: true };
}
} catch (e) {
return { error: true };
}
}

用戶端編號可以從 Google API 的憑證頁面中找到

三、使用 Firebase 的登入流程

firebase 提供的 popup/redirect 兩種方法
只能用在 web 上,在手機上會報錯:

Error: This operation is not supported in the environment this application is running on. "location.protocol" must be http, https or chrome-extension and web storage must be enabled.

所以我們在行動端只能用進階做法

1. 到 firebase console 開啟 Google sign in 的功能

appId 和 appKey 可以在 Google API 頁面找到

2. 定義 onSignIn()

1
2
3
4
5
6
7
8
9
10
11
12
13
14
15
16
17
function onSignIn(googleUser) {
var unsubscribe = firebase.auth().onAuthStateChanged((firebaseUser) => {
unsubscribe();
// 似乎是listener的常用語法,藉由呼叫函式本身,讓後面的程式只運行一次就好
if (!isUserEqual(googleUser, firebaseUser)) {
var credential = firebase.auth.GoogleAuthProvider.credential(
googleUser.idToken,
googleUser.accessToken
);

firebase.auth().signInWithCredential(credential)
.catch((error) => { alert('onSignInCredential'+error) });
} else {
console.log('User already signed-in Firebase.');
}
});
}
  • 為什麼 unsubscribe 裡面還有 unsubscribe? link

  • GoogleAuthProvider.credential()有兩個input,idTokenaccessToken,官網給的寫法是googleUser.getAuthResponse().id_token,但因為我們用的是 Expo Google.logInAsync回傳的googleUser,他不含任何函式,自然就沒有getAuthResponse()可以用。 link

3. 定義 isUserEqual()

1
2
3
4
5
6
7
8
9
10
11
12
13
function isUserEqual(googleUser, firebaseUser) {
if (firebaseUser) {
var providerData = firebaseUser.providerData;
for (var i = 0; i < providerData.length; i++) {
if (providerData[i].providerId === firebase.auth.GoogleAuthProvider.PROVIDER_ID &&
providerData[i].uid === googleUser.user.id) {
// We don't need to reauth the Firebase connection.
return true;
}
}
}
return false;
}
  • 這邊的 googleUser.user.id 也是上述的原因

4. 把onSignIn()放進 signInWithGoogleAsync() 裡並傳入 user 物件

1
2
3
4
5
6
7
8
9
10
11
12
13
14
async function signInWithGoogleAsync() {
try {
const result = await Google.logInAsync({
androidClientId: '994735805040-7q2nlrcnma0mssgvs7fimrmdp6dvuaqk.apps.googleusercontent.com', //在這裡貼上你的用戶端編號
// iosClientId: YOUR_CLIENT_ID_HERE,
scopes: ['profile', 'email'],
});

if (result.type === 'success') {
onSignIn(result) // <---- HERE
return result.accessToken;
} else { return { cancelled: true } }
} catch (e) { return { error: true } }
}

完成! 可以到這裡參考我的範例

什麼時候需要匿名登入?

操作 app 時
其實不一定需要用戶「真的」登入
我們可以在使用者第一次使用 app 時讓他(或自動)匿名登入
如此一來就能在用戶不提供個資的情況下紀錄他的活動
例如 加入購物車

在 firebase 匿名登入很簡單
首先到 firebase console 開啟匿名登入的功能

接著再 app 中使用:

1
firebase.auth().signInAnonymously()

與其他登入方式相同,我們可以建立 user state listener

在用戶登入的時候獲取的用戶資訊

如 uid 之類的

1
2
3
4
5
firebase.auth().onAuthStateChanged((user)=>{
if (user){
console.log('uid: ',user.uid)
}
})

匿名登入有個問題,如果有個用戶一直登入登出,這會導致匿名帳號不斷被建立,像這樣:

所以比較好的做法是:當用戶要登出匿名帳號時,一併把他的帳戶從後台刪除

雖然 firebase 的用戶數限制很高

但養成後台乾淨整齊的習慣還是很重要的

轉換成實名帳戶

用戶在匿名登入一段時間後,也許他們覺得不錯想要註冊

這時我們就要提供轉換帳戶的功能

首先製作 credential

  • Email

1
const credential = firebase.auth.EmailAuthProvider.credential(email, password);
  • Google

1
2
3
4
var credential = firebase.auth.GoogleAuthProvider.credential(
googleUser.idToken,
googleUser.accessToken
);

接著用 firebase.auth().currentUser.linkWithCredential(credential)

1
2
3
4
5
6
7
8
const auth = firebase.auth()
auth.currentUser.linkWithCredential(credential)
.then((usercred) => {
var user = usercred.user;
console.log("Anonymous account successfully upgraded", user);
}).catch((error) => {
console.log("Error upgrading anonymous account", error);
});

references